
A landing page builder is the ideal way to get started with your sales funnel without needing to know any code. Whether you want to launch a product or build your email list, it’s a crucial step in your marketing plan. One platform that’s hugely popular for building websites (without the tech) is Squarespace. Here’s how to create a landing page on a Squarespace website the easy way.

Sign Up for Squarespace
If you don’t already have a Squarespace site, you’ll need to get an account. When you head to the website, you’ll see different plan options. This is important because you want a plan that will give you all the right options and customizations you need for a custom landing page.
While the basic plan will allow you to build your landing page, you need at least a business plan if you want to have access to things like custom CSS for design purposes. That, of course, is more expensive. So weigh up your options. If custom design and custom code aren’t an issue right now (which is usually the case if you are a new startup and don’t have branding), then go with the basic personal plan.
Access the Squarespace Dashboard
Once you’ve selected your plan, you’ll see the Squarespace dashboard. It’s worth spending half an hour familiarizing yourself with the layout. It will help you avoid that stop-start pattern that’s easy to fall into when you experiment with new platforms.
Try out some simple tasks to become more familiar with the dashboard. Clicking on the pages section will let you create new web pages, so give that a go. When you add a new page, you’ll see a gear icon next to the new page option. That allows you to change the page settings. You’ll also see content blocks, which allow you to arrange the structure and organize the layout of all the content on a web page.
This is also a good time to check Squarespace integration guides with any third-party tool you want to integrate. For example, you will need to link your Squarespace website with your email marketing tool so that you can build your mailing list. If you don’t have an email autoresponder, you can find some recommendations in our resources section. You can also head to settings in Squarespace and third party tools, to browse their add-ons.
Choose a Template
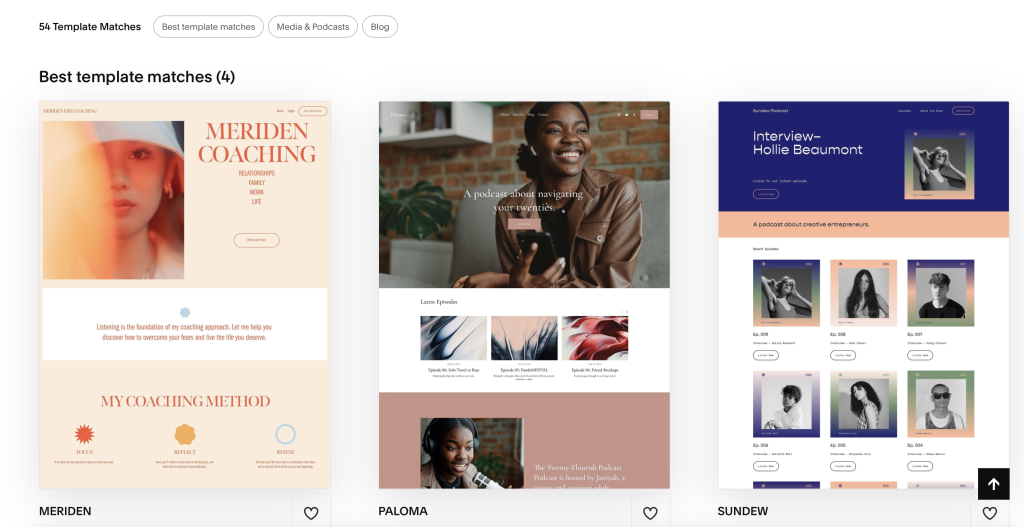
Your first big task is to pick your design from the Squarespace templates. There are two things to remember here. You need a template that aligns with your business goals (what specific goal do you hope to achieve in the next 12 months?) and one that aligns with your target audience. It’s your foundation, so take the time to visualize where you want your business to be before you pick your design, and don’t go for ones simply because you like them. It’s about what will resonate the most with your website visitors.
Don’t forget that you can change templates later. So, even if you have added content or published your landing page, you can change your mind. So don’t feel like it’s set in stone at this stage, and if you can find the perfect one, settle with the imperfect second-best. However, as all templates are different, don’t forget that any future switches might mean some editing to make sure your content is in the right place. So, only do it if you have some spare time on your hands to get that sorted.
Finally, don’t forget that it’s a landing page template you are after. So it’s got to be bold and simple. It serves a purpose. It’s not a dashboard or an information desk. It’s there to get an audience member to sign up for your email list.
Creating and Organizing Your Blocks
As we mentioned earlier, you’ll have blocks in Squarespace that allow you to add or move different types of content on a page.
It’s important you get this structure working effectively for your first dedicated landing page, as it helps the user experience. It’s also a more natural progression for the visitor to browse, so it’s more likely to lead to a conversion. For example, use font hierarchy. Titles should have the biggest fonts. Subheadings are smaller, and so forth.
Remember where the eyes scan when landing on a new page. That’s where you want your most important information to be. Take a look at some example landing pages from similar brands in your field to get a better feel for this layout.
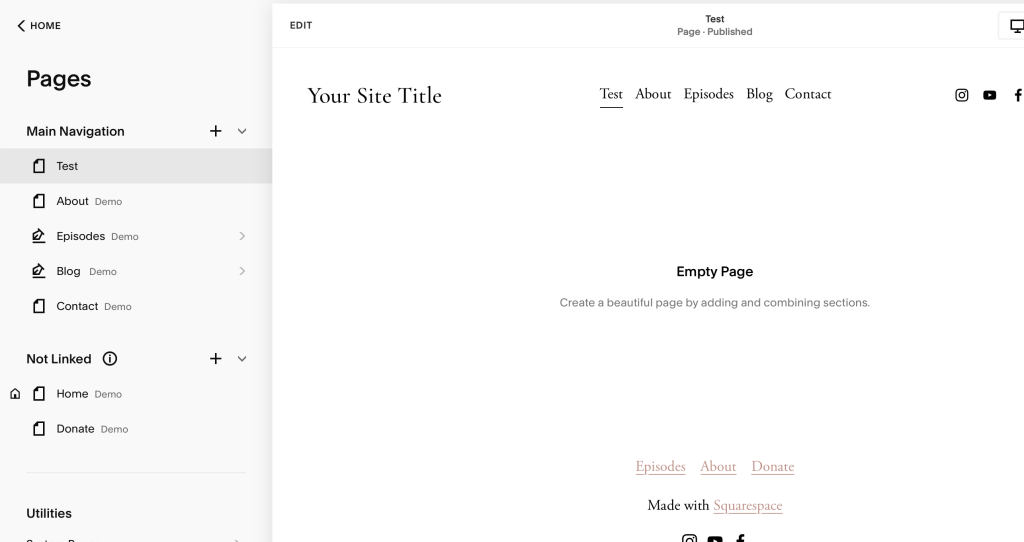
If this is your first time creating a landing page, keep it simple. A simple landing page has a heading, subheading, button, and an image.
Start by replacing any default image on the template with something more aligned with your offer. Use the headline to present the benefit of your offer or new product, or ask the audience a question, and use the subheading to flesh this out in a bit more detail. Make sure the button is something that encourages the audience to take action, like “Yes, send me the ebook” rather than “Submit”.
How to Edit Your Landing Page Settings
You’ll need to set your landing page to help improve performance and align the design with your sales funnel goals. For a basic funnel, that goal will be generating leads. Here are the easy steps to follow:
Access the Page Settings
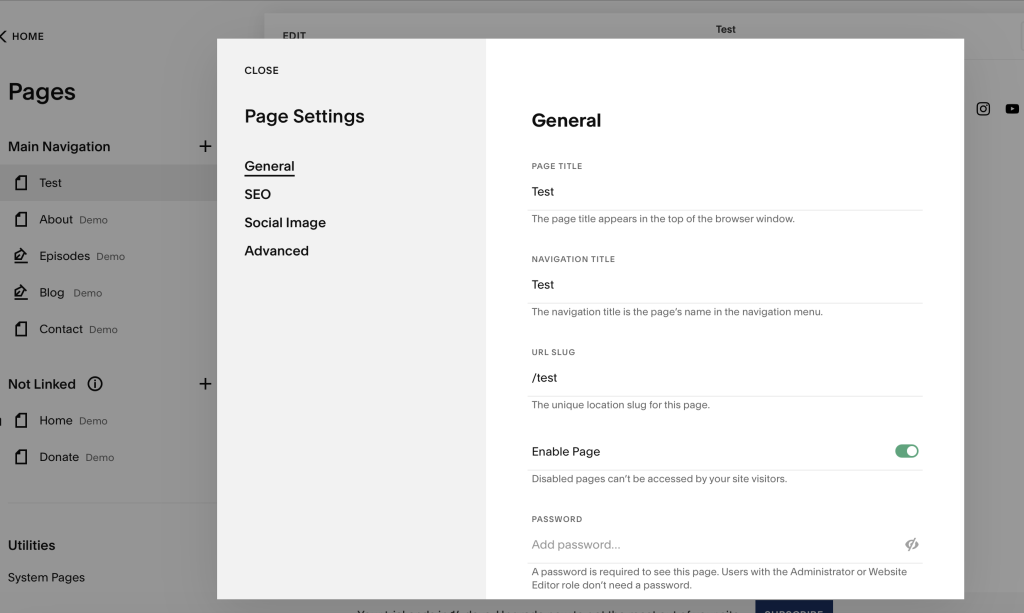
First, navigate to the pages menu in your Squarespace dashboard. Choose the page you want to edit and click on that gear icon that Squarespace provides for settings.
Change the Title and Slug
The first thing you’ll want to change is the page title. It’s good for SEO. Make the title relevant and keyword-rich. You should also change the URL slug so that it reflects the title and is search-friendly.
Configure Other SEO Options
There are a few specific SEO settings you may want to change, too, to aid with search results. The most important is the page description. Make sure it includes your primary keyword, and make it sound enticing. That’s what people will read if they find your page on Google, so it should be clickable.
Adjust Social Media Settings
Social media will be a valuable asset when getting leads into your funnel. The settings here will make your page look more appealing when you link to it on social media. Use a fantastic and relevant image that grabs attention. And make sure the title and the description are share-worthy. Remember that sharing on social media is also important for brand awareness, so anything you can do to brand it – like making the image branded – will help.
Inspect the Advanced Options
If you plan on running an advertising campaign, you’ll have a tracking code you need to add to the page. The advanced tab is where you add that. This area is also useful if you want to integrate specific, advanced functions, but that’s not something to worry about if you are a beginner building your first landing page.
Integrating Forms and CTAs (Call-to-Action)
A new landing page must include a form for the visitor to enter their email address, and it needs a clear call to action with a button where they can submit that address. Here’s how to set that up in a Squarespace landing page.
Use a Form Block
Choose a form block for the page. This is how you’ll capture email addresses or other contact details like the visitor’s first name. This block is the key tool for creating any lead-generation landing pages.
Customize Your Form
Head to the form editor to make changes to the default form. You can add or remove fields. We recommend sticking to a single email address field to maximize conversion rates. If you want to send personalized emails, you should include a first-name box, too. In rare circumstances, you’ll want to ask for contact information that includes a phone number, such as if you are offering a free call. But if you aren’t planning on doing that, don’t ask for phone details, as it will cause your conversion rate to drop.
Next, customize the submit button text. You want the button block to add the button to your landing page and add it below the form fields. You want something to entice a specific action here and align it to your lead magnet, like “Yes, give me access” if you are promoting a free members area or “Email me the cheat sheet now” if you have a free PDF cheat sheet.
Testing Your Landing Page
When you’ve set up your form and button, it’s best practice to make sure you test it to ensure everything functions as intended. Preview and test your landing page. Squarespace offers a preview feature that will let you see how the page looks on different devices and browsers. Submit the form and check that you get the correct confirmation page. Check load times and responsiveness to ensure you create a seamless user journey.
Publishing Your Landing Page on Squarespace
When you’ve tested your landing page on Squarespace, your final step is to publish that page. Do one final check of all content and design elements. Use the navigation menu on the dashboard to the pages section on your Squarespace account and head to the landing page you want to publish. Use the settings icon to access the option called “Visibility”. Change this to public and save your changes. Your landing page is now live. It’s an easy process, which means you can set up and share a new landing page with your audience quickly, helping to get your sales funnel going or make a start on any new product launches.
How to Create a Landing Page on Squarespace: Some Final Thoughts
We hope you found this guide on how to create a landing page on Squarespace helpful. If we can leave you with one final tip, it’s this: don’t overcomplicate it. Keep your landing page simple and get your sales funnel launched. You can always tweak or fine-tune it later. For more tips on how to create your end-to-end landing page, head here to get our free sales funnel quick-start guide.
Pin This Post
Free: Loyalty Loop Starter Kit
Get a 2-minute loyalty quiz, 5 plug-and-play email templates, and a simple offer planner — everything you need to turn visitors into regulars.
No spam. Unsubscribe any time.